Goals
- Name classes and ids semantically.
- Style text.
- Understand the box model.
- Understand floating and positioning.
- Know how and when to use the following HTML tags:
<h1>to<h6><p>,<a>, and<img>,<ul>,<ol>, and<li><div>,<span><dl>,<dt>, and<dd><form>,<fieldset>, and<input>
- Use HTML5 elements semantically:
<header>,<section>,<aside>,<article>,<footer>
- View source on a web page and understand it.
- Summon Web Inspector quickly (hint: use keyboard shortcuts).
- Quickly build a simple layout.
What is HTML? HTML5?
HTML is the markup language that defines the structure of your web page. If a web page were a house, HTML tags would be the 2x4s you assemble into the house’s frame. All the content on your page lives inside little “boxes” defined by HTML elements (more on boxes and elements below).
Semantic HTML refers, broadly, to HTML written in a way that is expressive—that in some way describes its content—and, narrowly, to a standardized set of semantic tags introduced with HTML5.
It’s standard practice to, as much as possible, name CSS classes and ids so
that they describe the role of the content within the HTML element they’re
attached to. For example:
Semantic HTML, illustrated
Unsemantic:
<div class="right-aligned">
  <div class="bold">Smurf Movie Kinda Sucks</div>
  <div class="body-text">
    Not surprisingly, this week's release of
    <span class="darkbold">The Smurfs</span> kinda sucks.
  </div>
</div>
The above describes the formatting of each element’s content, not its role. Among other problems, this isn’t future-proof. What if, in the future, you want inline movie titles to be italicized rather than bolded?
Bad Semantics:
<div class="article">
  <div class="article-title">Smurf Movie Kinda Sucks</div>
  <div class="article-content">
    Not surprisingly, this week's release of
    <span class="movie-title">The Smurfs</span> kinda sucks.
  </div>
</div>
This is semantic, but not preferred. HTML5 introduced tags that communicate the above more succinctly.
Good Semantics:
<article>
  <h1>Smurf Movie Kinda Sucks</h1>
  <p>
    Not surprisingly, this week's release of
    <span class="movie-title">The Smurfs</span> kinda sucks.
  </p>
</article>
Example borrowed from here —apologies to any Smurfs fans out there.
Ahh. So much easier on the eyes, right? Notice that this uses the semantic
article tag, which was introduced with HTML5. Prefer HTML5 tags wherever
possible—they’ll keep your code expressive while minimizing visual noise.
Notice too that there are still cases where you’ll have to use the unsemantic
tags <div> and <span> semantically, with the aid of a well-named class or
id.
Semantic Tags
<header>, <nav>, <section>, <article>, <aside>, <figure>,
<figcaption>, <footer>, <details>, <summary>, <mark>, <time>
For some examples of use cases for each of these, see HTML5 Semantic Elements (w3schools).
What is CSS?
CSS (Cascading Style Sheets) is the language used to add styling to your page. Separating structure from style helps keep your markup clean and maintainable.
It also means the same underlying HTML can be presented in radically different ways just by swapping its stylesheet (check out CSS Zen Garden to see this beautifully illustrated).
Basic Selectors
1. The tag itself
nav { ... }<nav> ... </nav>2. id selector (any id selector can only be used once)
#navigation { ... }<div id="navigation"> ... </div>3. class selectors (can be used multiple times)
.box { ... }<div class="box"> ... </div>class vs. id
CSS classes and ids are just groupings of CSS rules. CSS classes are meant to be used any number of times, but ids are unique—there can be only one id of a given name on a page.
Example:
The following HTML
<!-- index.html -->
<body>
    <p id="introduction" class="emphasized">
        Lorem ipsum dolor sit amet, consectetur adipisicing elit, sed do eiusmod.
    </p>
    <p class="emphasized">
        Ut enim ad minim veniam, quis nostrud exercitation ullamco laboris nisi.
    </p>
    <p>
        Duis aute irure dolor in reprehenderit in voluptate velit esse cillum.
    </p>
</body>
can be styled with CSS as follows:
/* stylesheet.css */
 body { font-weight: normal; }     /* by tag */
 #intro { font-style: italic }     /* by id */
 .emphasis { font-weight: bold; }  /* by class */
Interlude: Some nomenclature
We’ve been throwing around elements and attributes and rules without really defining what we’re talking about. Let’s consolidate some of this terminology by way of an illustration:
Anatomy of an HTML element
<h1>Section Title</h1>
<a href="http://google.com" class="light">A link to Google</a>
<img id="author-photo" src="img/author.jpg">| HTML | Example |
|---|---|
| element | <h1>Section Title</h1> |
| tag | opening: <h1>, <a>; closing: </h1>,</a> |
| attribute | href and class in <a href="..." class="..."> |
Anatomy of a CSS rule
h1 { color: blue; font-size: 18px; }
.light { font-weight: 300; }
#author-photo { width: 80%; }| CSS | Example |
|---|---|
| rule | h1 { color: blue; font-size: 18px; } |
| selector | h1, .light, #author-photo |
| property | color in color: blue |
| value | blue in color: blue |
div vs. span
The HTML tags <div> and <span> are generic tags used to group elements together
and, with a CSS class and/or id, to add styling to particular elements on the
page.
The key distinction between the two is that a <span> is an inline element and a
<div> is a block element. What does that mean?
Inline vs. Block elements
Block level elements normally start (and end) with a new line when displayed in a browser. Inline elements are normally displayed without starting a new line.
Example block elements: <div>,<h1>, <p>, <ul>, <table>
Example inline elements: <span>,<b>, <td>, <a>, <img>
Note that this is the default behavior. You can manipulate how an element is
displayed on the page by setting display: block, display: inline, or
display: inline-block, among other possibilities.
The Box Model
Every element of a web page exists within an invisible box. This box is
demarcated by a border. That border can be invisible (if it has border-width
0, for example), but it’s always there.
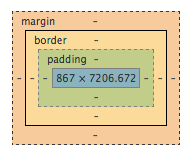
Margin and Padding
Every box has padding on the inside, surrounding its content but within its border, and a margin surrounding its border on the outside.
Since padding tells the browser the amount of space to preserve inside a
box (between content and border), the padding between any two elements is,
loosely speaking, “additive”: 10px of padding on two adjacent boxes will result
in 20px of space between their content (assuming no visible border or margin).
By contrast, margin specifies the amount of space to preserve around a box,
which will usually be collapsed between two adjacent elements of the same
type. A 10px margin on adjacent boxes produces a 10px space between their
borders, not 20px.
Chrome Developer Tools
To access Chrome’s Developer Tools, navigate to View > Developer > Developer Tools
or use the keyboard shortcut: ⌥+⌘+I on a Mac,
ctrl+shift+I otherwise.
(NB: Try out and use keyboard shortcuts greedily. They will make your life easier in the long run.)
Some of the facilities provided by DevTools:
-
Inspect Element
Inspect the HTML, CSS, and box model for a given element (click the magnifying glass and hover over a page element). DevTools brings up the relevant HTML, the associated styling, a box model visualization with element dimensions, all sorts of valuable information. -
Modify CSS In-Place
Select a page element. In the “Styles pane”, fiddle with its CSS. Adddisplay: noneto some elements. Pretty neat, huh?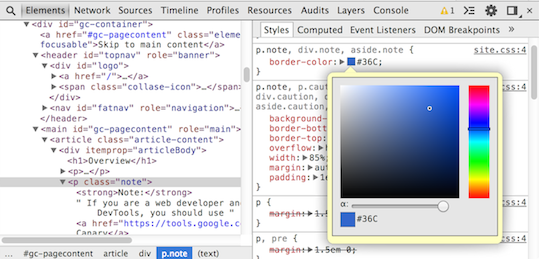
-
Modify HTML In-Place
Similarly, in Inspect Element mode, click on part of a web page. You should see the corresponding HTML highlighted in the DevTools Elements panel. Double-click on it and fiddle with it.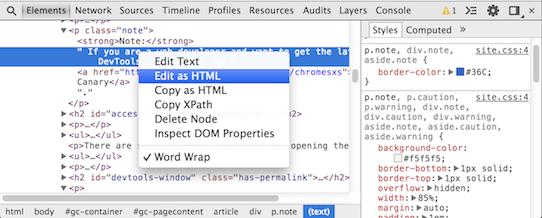
You can have all sorts of fun with this.
To wit, here’s the MDN landing page as it exists by default:
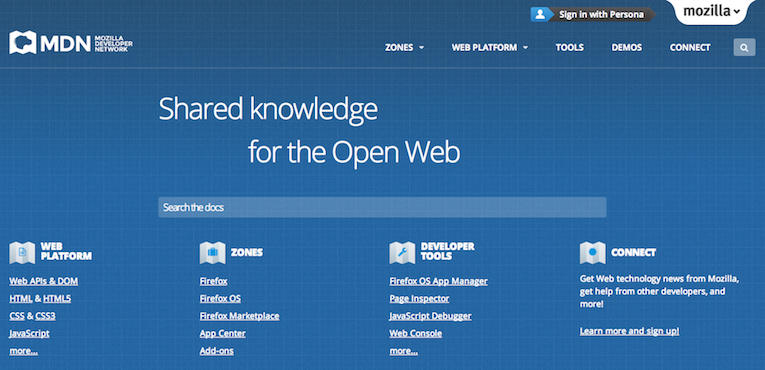
and here it is after some enhancements
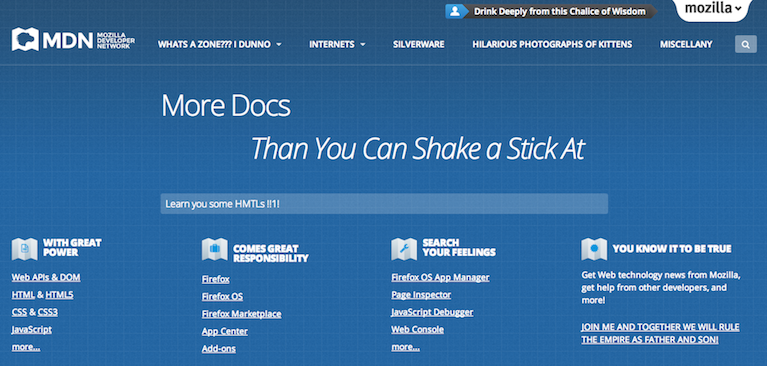
In other words, Chrome Developer Tools are extremely useful for interactively testing out potential styling changes or checking out “how they did that” when you see some cool bit of styling on someone else’s site.
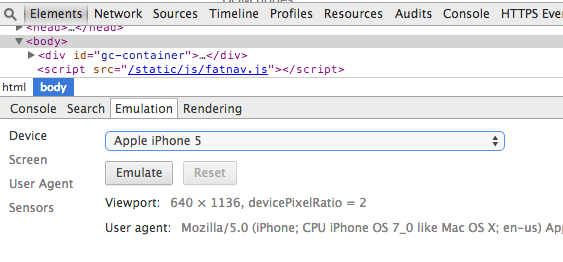
Mobile Testing
Want to see how your web site will look on a mobile device? Hit esc (the ‘escape’ key) to bring up the console, then click on “Emulation”.
Resources
w3schools has a lingering bad reputation earned during its error-ridden early days, but it’s not bad for getting a quick-and-dirty overview of whatever you’re researching.
MDN is the de facto canonical reference. When
someone tells you to RTFM (“Read the Fantastic Manual”) with respect to HTML/CSS,
they’re most likely referring to the MDN docs. It is detailed and exhaustive,
so the best way to find anything in it is with a google search:
mdn css font-weight, for example, or by using Chrome’s find (⌘+f)
feature on the HTML Element, HTML Attribute, or
CSS reference page.
Exercises (Optional)
- Create a three-column fixed-width layout with a navbar and header
- Create a two-column liquid layout with a navbar and header.
Suggestions: Work with a partner as a driver/navigator pair. Get feedback on your code from an instructor or TA.
Comments? Questions? Corrections? Use the comments thread below.